At the time of writing, the DNG files produced by the panoramic stitching tool are not editable inside the Capture One Cultural Heritage edition, and thus is difficult to use in a Heritage workflow scenario. It is a feature that we continue to be excited about, but it remains limited to the Capture One Pro workflow. For high production workflows, we recommend the DT Batch Stitch workflow tool.
Capture One 22 adds the much requested Panoramic Stitching tool, bringing stitching into the RAW image workflow. We and the rest of the heritage community will be curious about using this new feature for stitching collection material to increase PPI for larger material and material like film. As with any new process, we recommend testing with your collection objects, as well as imaging workflows. In this post, I will evaluate the new stitching tools geometry, color accuracy and tonal reproduction, as well as the additional features and omissions of this tool.
Geometry
This tool now allows users to build a stitched file from Raw image files and receive a .DNG that is editable in the Capture One environment. There are at present, 4 user selectable methods for processing this stitch, Cylindrical, Spherical, Perspective and Panini.
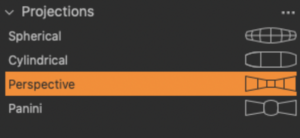
- Spherical projection is designed for multi-row stitching and takes into account multiple rows, for a very wide range of visual coverage.
- Cylindrical is designed for a single row of images that cover a field of view of more than 100 degrees. Cylindrical prioritizes vertical lines and attempts to keep them as vertical as possible,
- Perspective projection aims at simulating the field of view of your input images with the corresponding field of view of the wide-angle lens. This projection is useful for scenarios that cover less than ~100 degrees field of view and images captured with technical cameras using tilt/shift lenses.
- Panini is aimed at architectural images where the vanishing point is at the center of the frame. Vertical lines remain vertical, and lines going towards the vanishing point remain intact using this projection.
Once files are selected to build the stitch, we can opt to render previews of multiple projections, and toggle between them before making our final render. In our testing, the Perspective projection is the most true to the original object. Cylindrical and Spherical both impart some amount of transformation into the center geometry of images.
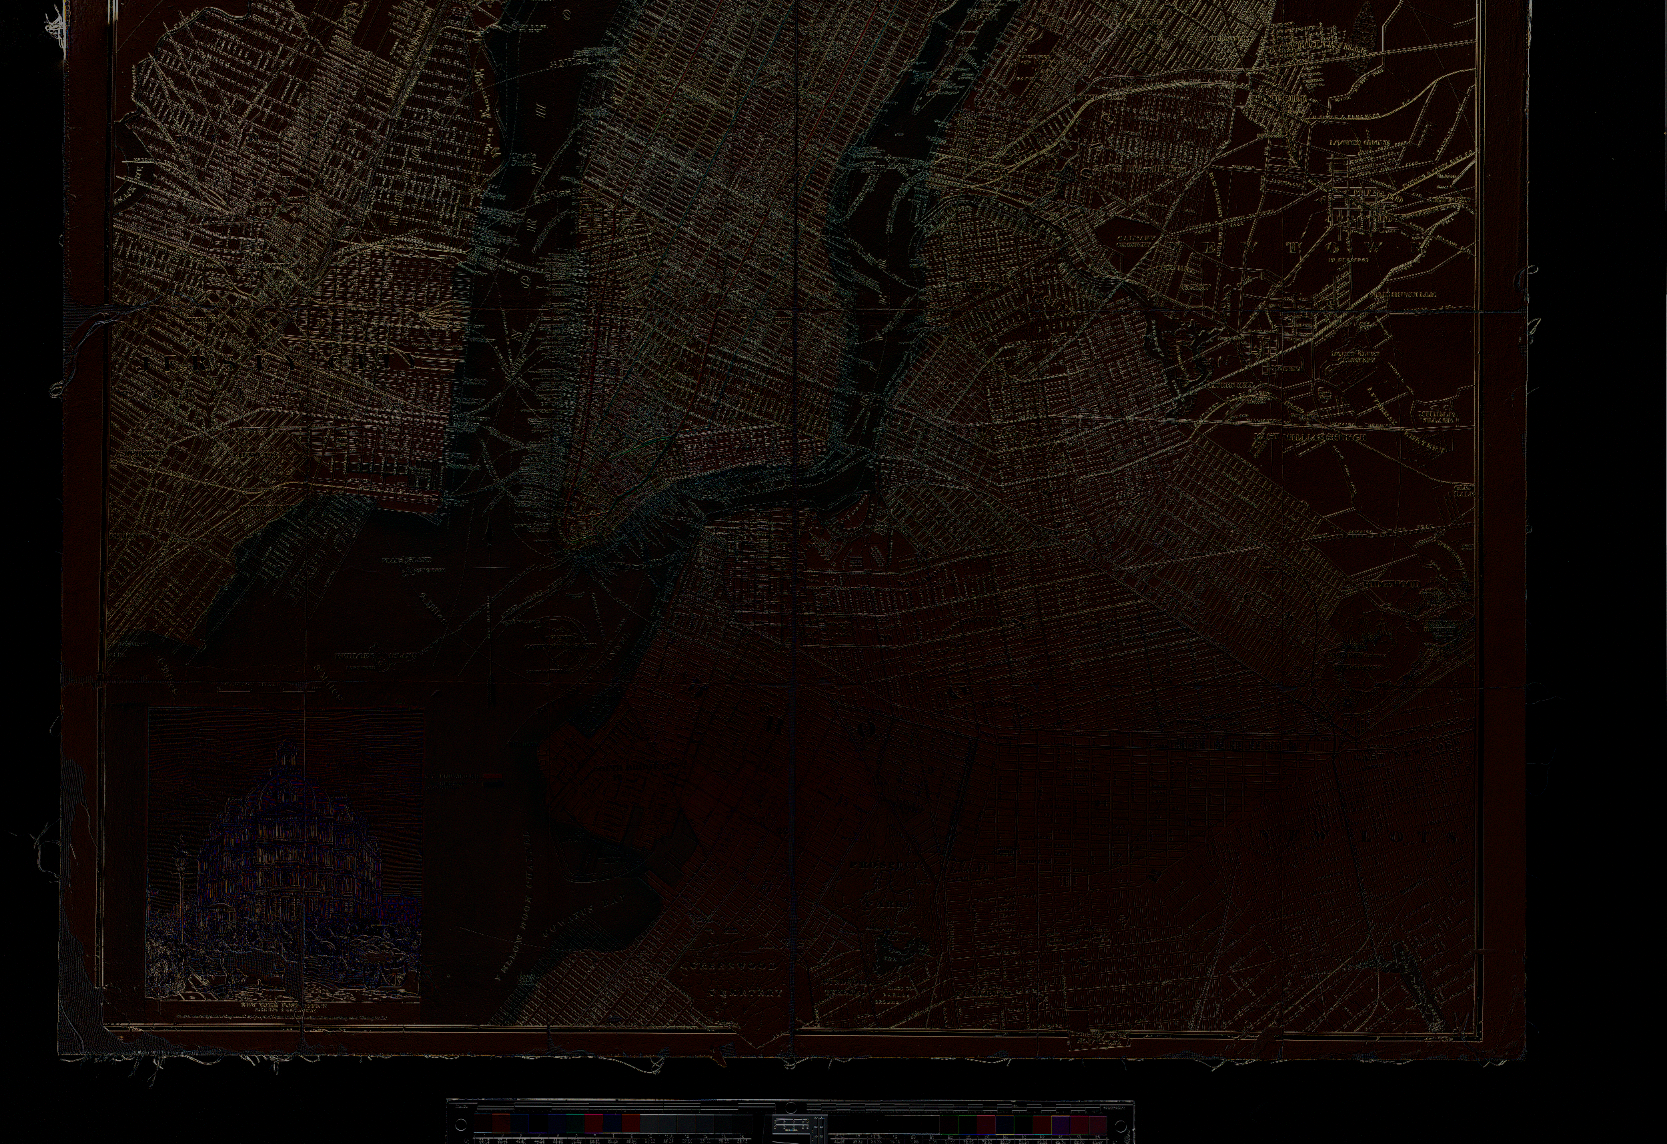
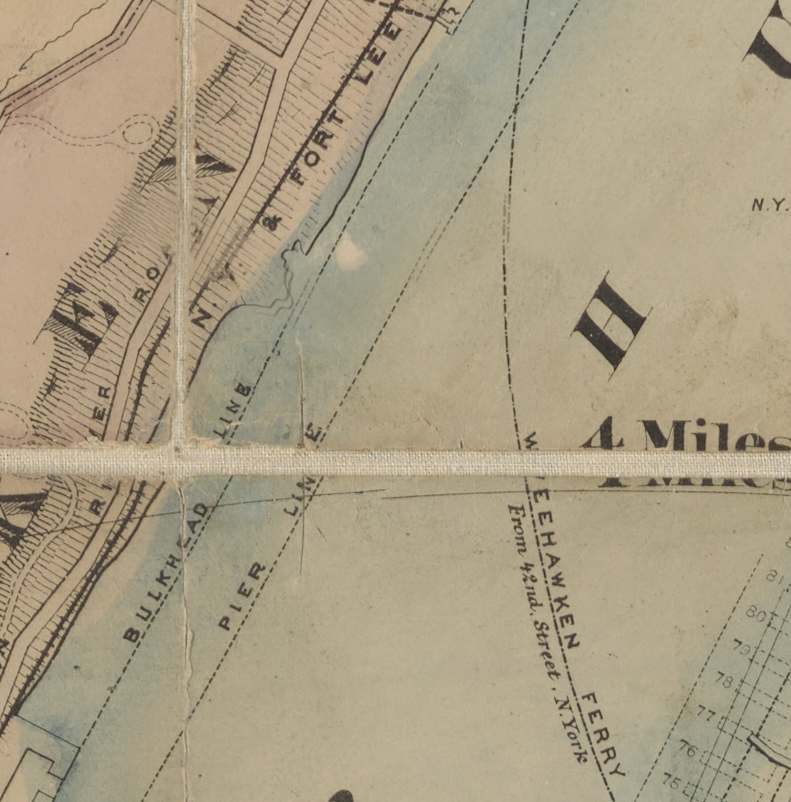
Below are some examples of the finished Capture One projections, with the overlaid component image segment in photoshop. For these images, areas of black indicate that the projection and the component image align properly. A perfect stitched file would result in a completely black frame, indicating that no changes from the original image are present. It should be noted that the map used in this example was purposefully moved ad-hoc, rather than on a x-y stage, such as the DT X Stage. Further refining the motion of the object relative to the camera, as illustrated in later examples will allow for a more refined stitch.
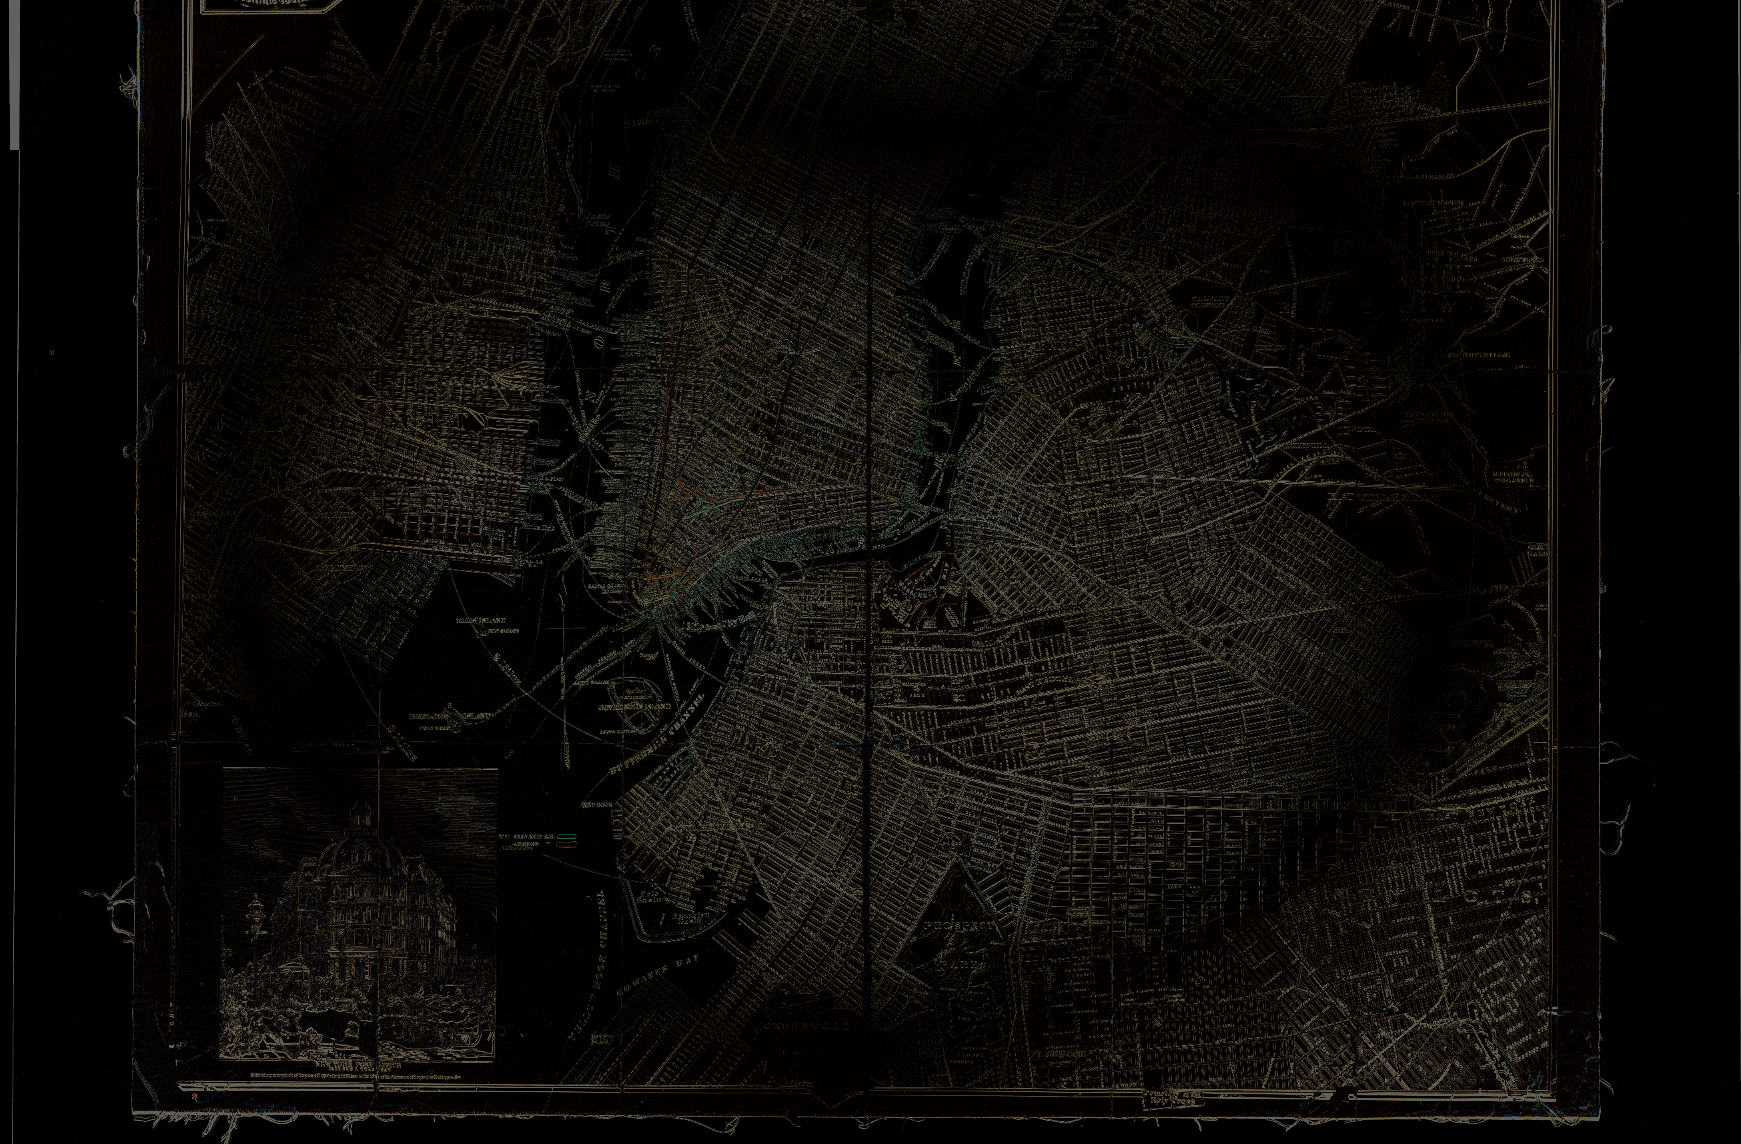
Spherical Projection
Note emphasis on correcting and shifting pixels in a spherical position
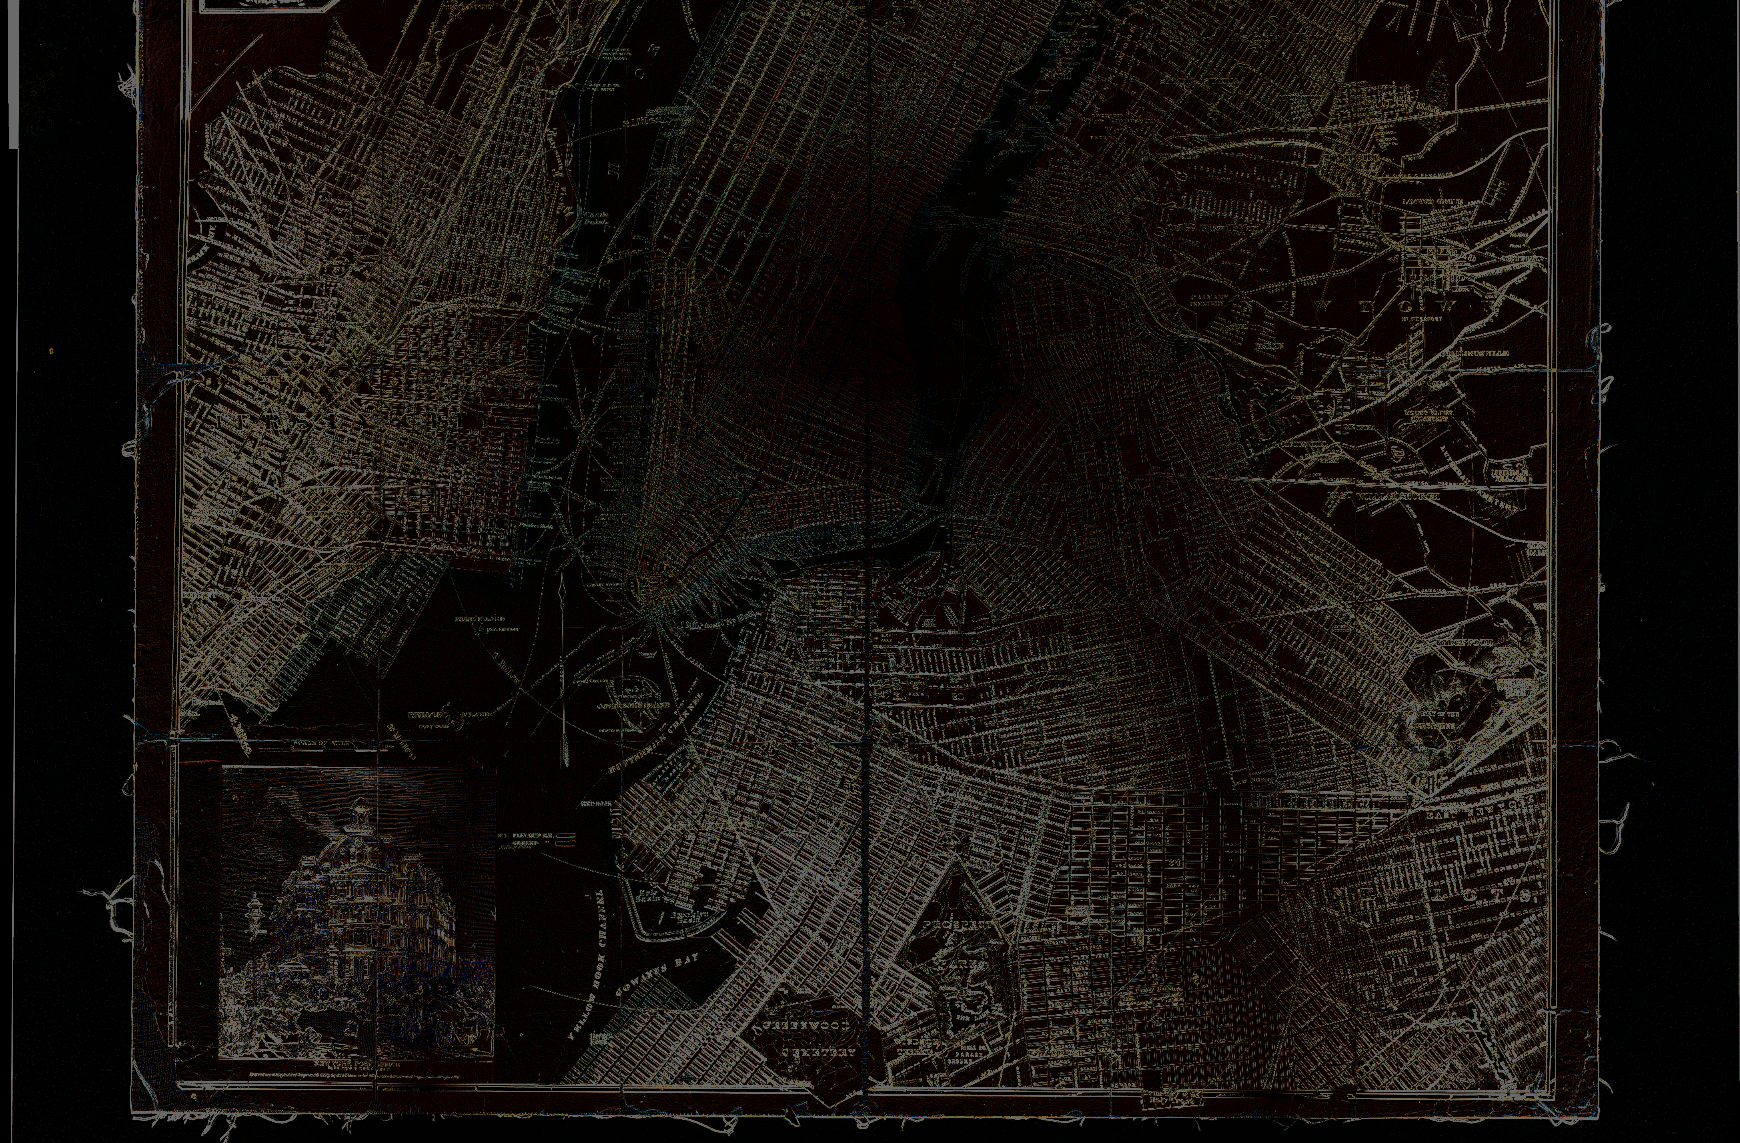
Cylindrical Projection
Note the adjustment of the edges
Perspective Projection
Very little adjustment made by the software to the underlying geometry
As a comparative analysis, this same map was stitched with Photoshop’s Photomerge auto algorithm, presently our tool of choice.
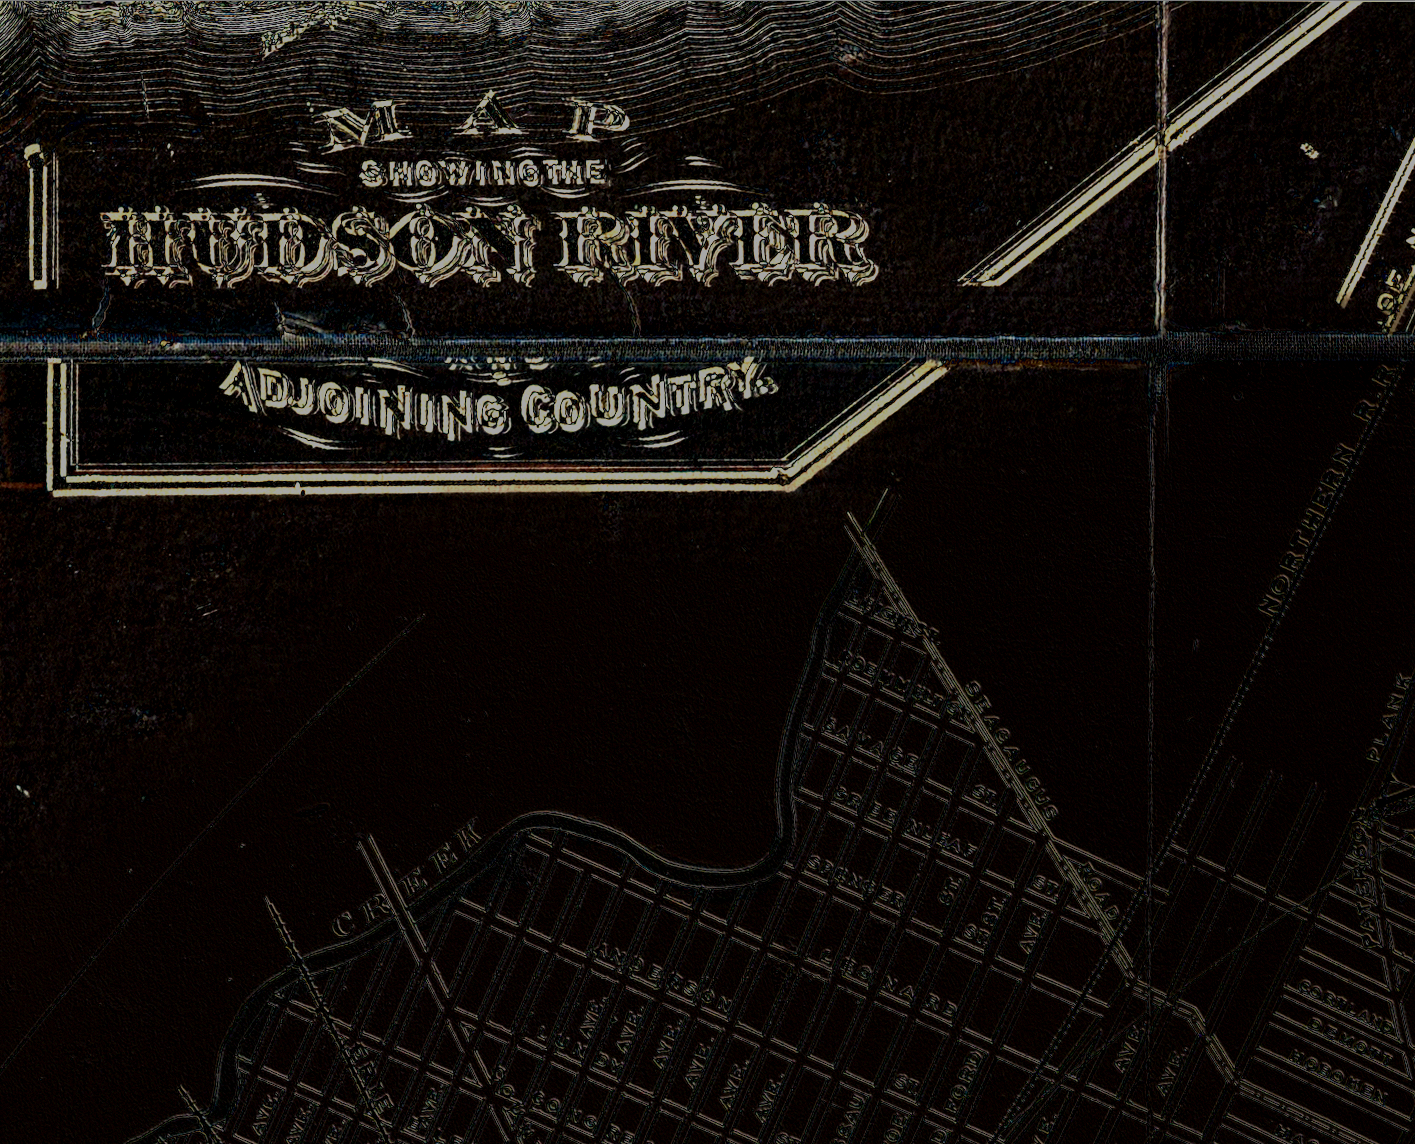
Capture One
Capture One shows a larger amount of adjustment in the added area, but also has some geometric adjustments in the original area.
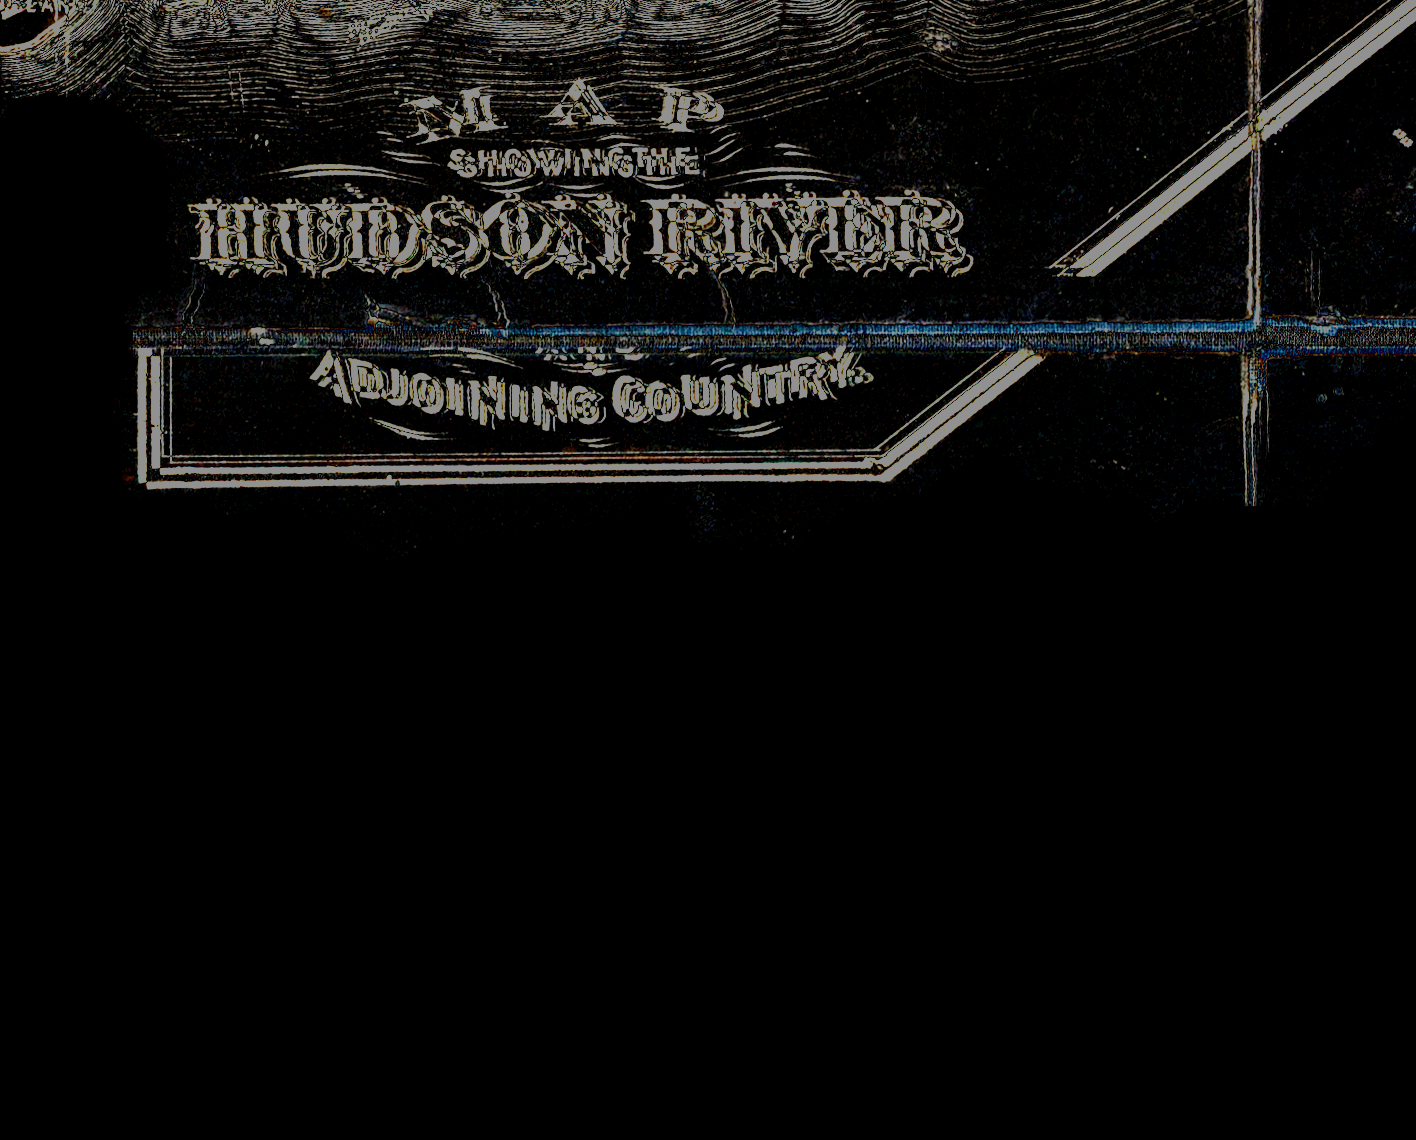
Photoshop
Photoshop stitching algorithm applies very little shift to the lower portion of the image here, and shows there is only a shift in the stitched on portion.
The next test was to evaluate the images for errors and observe how it handled misalignment. Maps are particularly strenuous objects for stitching, and have ample misalignment opportunities. Again, this map was moved by adjusting the physical map, rather than what the map was sitting on. This method promotes stitching and misalignment errors, as the shape of the object will change as we physically move it around. The use of a sliding stage such as the DT X stage would go a long way to addressing these types of errors.


Capture One
Photoshop
Capture one prefers to blur and blend images, where photoshop takes a hard edge approach, preserving detail, but at the detriment of absolut visual accuracy. Capture One loses out on accuracy, an approach which may be preferable for naturalistic stitching.

Color and Tone
Geometry and construction are half the battle here, with color and tone fidelity being the second component. As traditional stitching relies on the final rendered TIFF files, the output file largely matches the input files, and is the standard by which we will judge the quality of Capture Ones stitching.
Capture One generates a DNG file as the output of a stitched scene. This DNG transformation means we have to carefully evaluate the color and tone transformation, as the impact of adjustments can varry slightly between IIQ/EIP files and DNG files. The white balance tool in Capture One in particular seems to be very affected by the DNG transformation. Re-white balancing on a neutral patch, such as patch #15 on an ISA OLT will result in a proper response. There is some exposure loss as well, although very slight, and should be corrected. For this reason, we need to keep the color targets in the image.


Color accuracy once the image was white balanced off a known gray patch was in line with the component images. With these charts, we do want to be looking out for general trends, rather than being concerned with spot differences. This image was processed using the Phase One CH ICC profiles.


Color Summary
At the time of this article, it’s unclear whether the white balance and exposure shift are coming from the DNG transformation or other source. Once corrected, we do see a similar amount of overall accuracy, as well as similar trends between the two target results.
Other Features
Because Capture One keeps the stitched file in the RAW workflow, we have the ability to make further adjustments. We also retain all the image metadata, including date and time fields which relate to the original captured images. This is in contrast to other stitching programs where the resulting file can have a subset of metadata from the original file, and will have different date and time fields, separating it from the original captures.
As the file is retained in the Capture One system, we can use our existing export presets and apply them to this new large file. Filters, ratings and color tags are also still usable for this new file.
Notable workflow exceptions in this tool include the ability to batch process multiple stitches. If your workflow requires the automation of a large volume of stitched images, a tool such as the DT Batch Stitch tool is going to remain much faster. The DT Batch Stitch tool also includes the quality control overlay, indicating where the stitched areas align, and highlighting the area for errors. Capture One does not have the ability to easily identify the stitch lines, making QC a bit challenging and more time consuming. As these stitch lines are not apparent, it’s possible for small stitching errors to go unnoticed by an operator.
The new Capture One stitching tools presently only work on RAW images. This excludes JPEG and TIFF stitching workflows. This tool also does not support stitching captures from Achromatic cameras. At the time of writing, the Cultural Heritage version was unavailable, so the AutoCrop functionality was not able to be tested. Once available, we will test this option!
Summary
In summary, the addition of stitching to Capture One shows promise, but it is not without drawbacks. The geometric accuracy is very close to that of photoshop, although we stress the need for precise movements. The blending methods used in this tool indicate that it is designed with landscapes and architecture in mind, so it is particularly sensitive to misalignments.
At the time of writing, the only significant reservation I have is the white balance and exposure shifts during the DNG transformation. While this can be corrected, it is a bit alarming, and changes how steps need to be performed in a workflow.
This new addition shows promise, but will require further investigation by us and our clients; please contact us with your own thoughts and results, so we can all learn whether, how, and with what limitations, optimizations, and workflows this new tool can be used.
To learn more, fill out this form: