
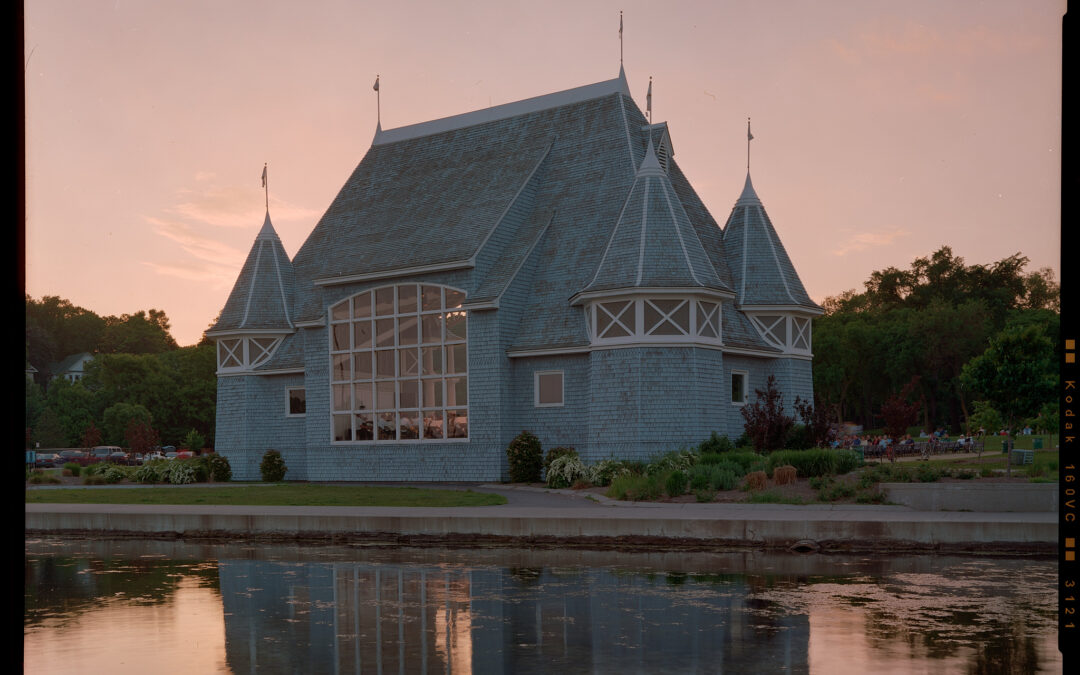
At IS&T Archiving 2026 we had the pleasure of unveiling the DT Stellar RGBW to the heritage community. Combined with DT Nexus, this new light brings a set of new capabilities to a variety of transmissive materials, including a mode that increases resolution for black-and-white negatives and rapid sequential capture of both the front and back of photographic slides. But what excited the IS&T audience most was its dedicated mode for historically authentic capture of color negative film.
*Photos courtesy of Todd Schweikert
Color Negatives Weren’t Designed to Directly Encode Color
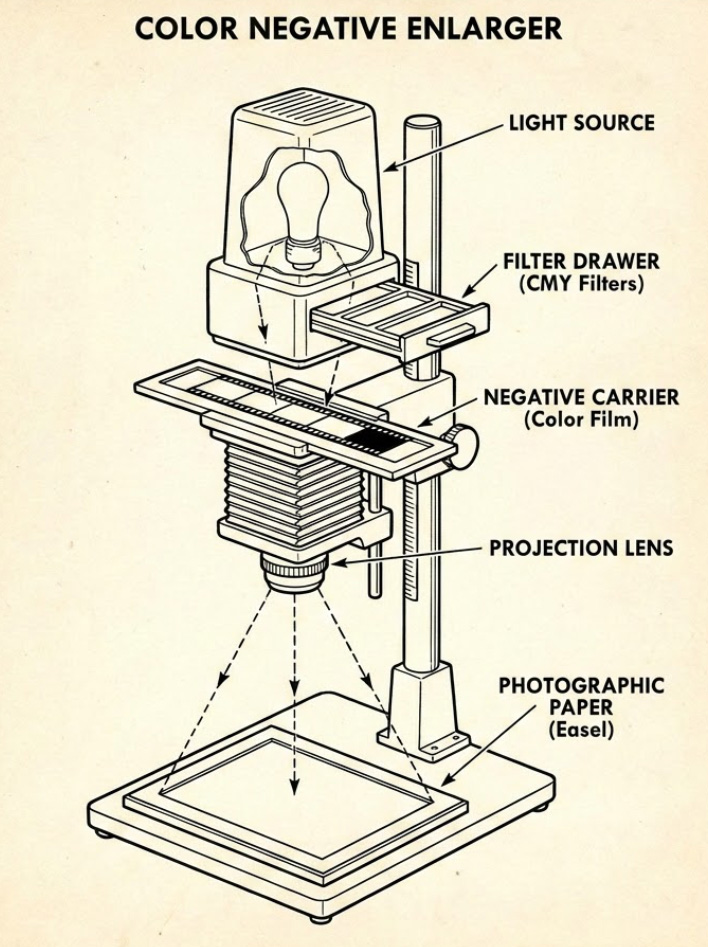
The heart of the issue with digitizing color negatives is that they were never designed to contain color on their own. Instead, color negative film was designed to be a physical spectral filter within a projector-filter-negative-paper system. It’s not just that negatives have inverted tonal polarity, or that they typically carry an orange-brown mask. It’s that the formation of color was only ever calculated together with a specific non-white illuminant and the non-uniform response of a specific photographic paper. It’s like music written to be performed by a particular band, on a particular set of instruments, in a particular key.
When you image color negative film with white light and then invert and white balance the result, the image is badly contaminated by channel cross-talk, leading to weird, muddy, non-linear colors. There are software fixes that try to untangle color captured the wrong way — tools like Negative Lab Pro, or the recent “Convert Negative” feature in Capture One. But as you’d expect, it’s far better to start with color that was formed correctly in the first place.
30-Second Calibration per Emulsion, Under a Second per Image
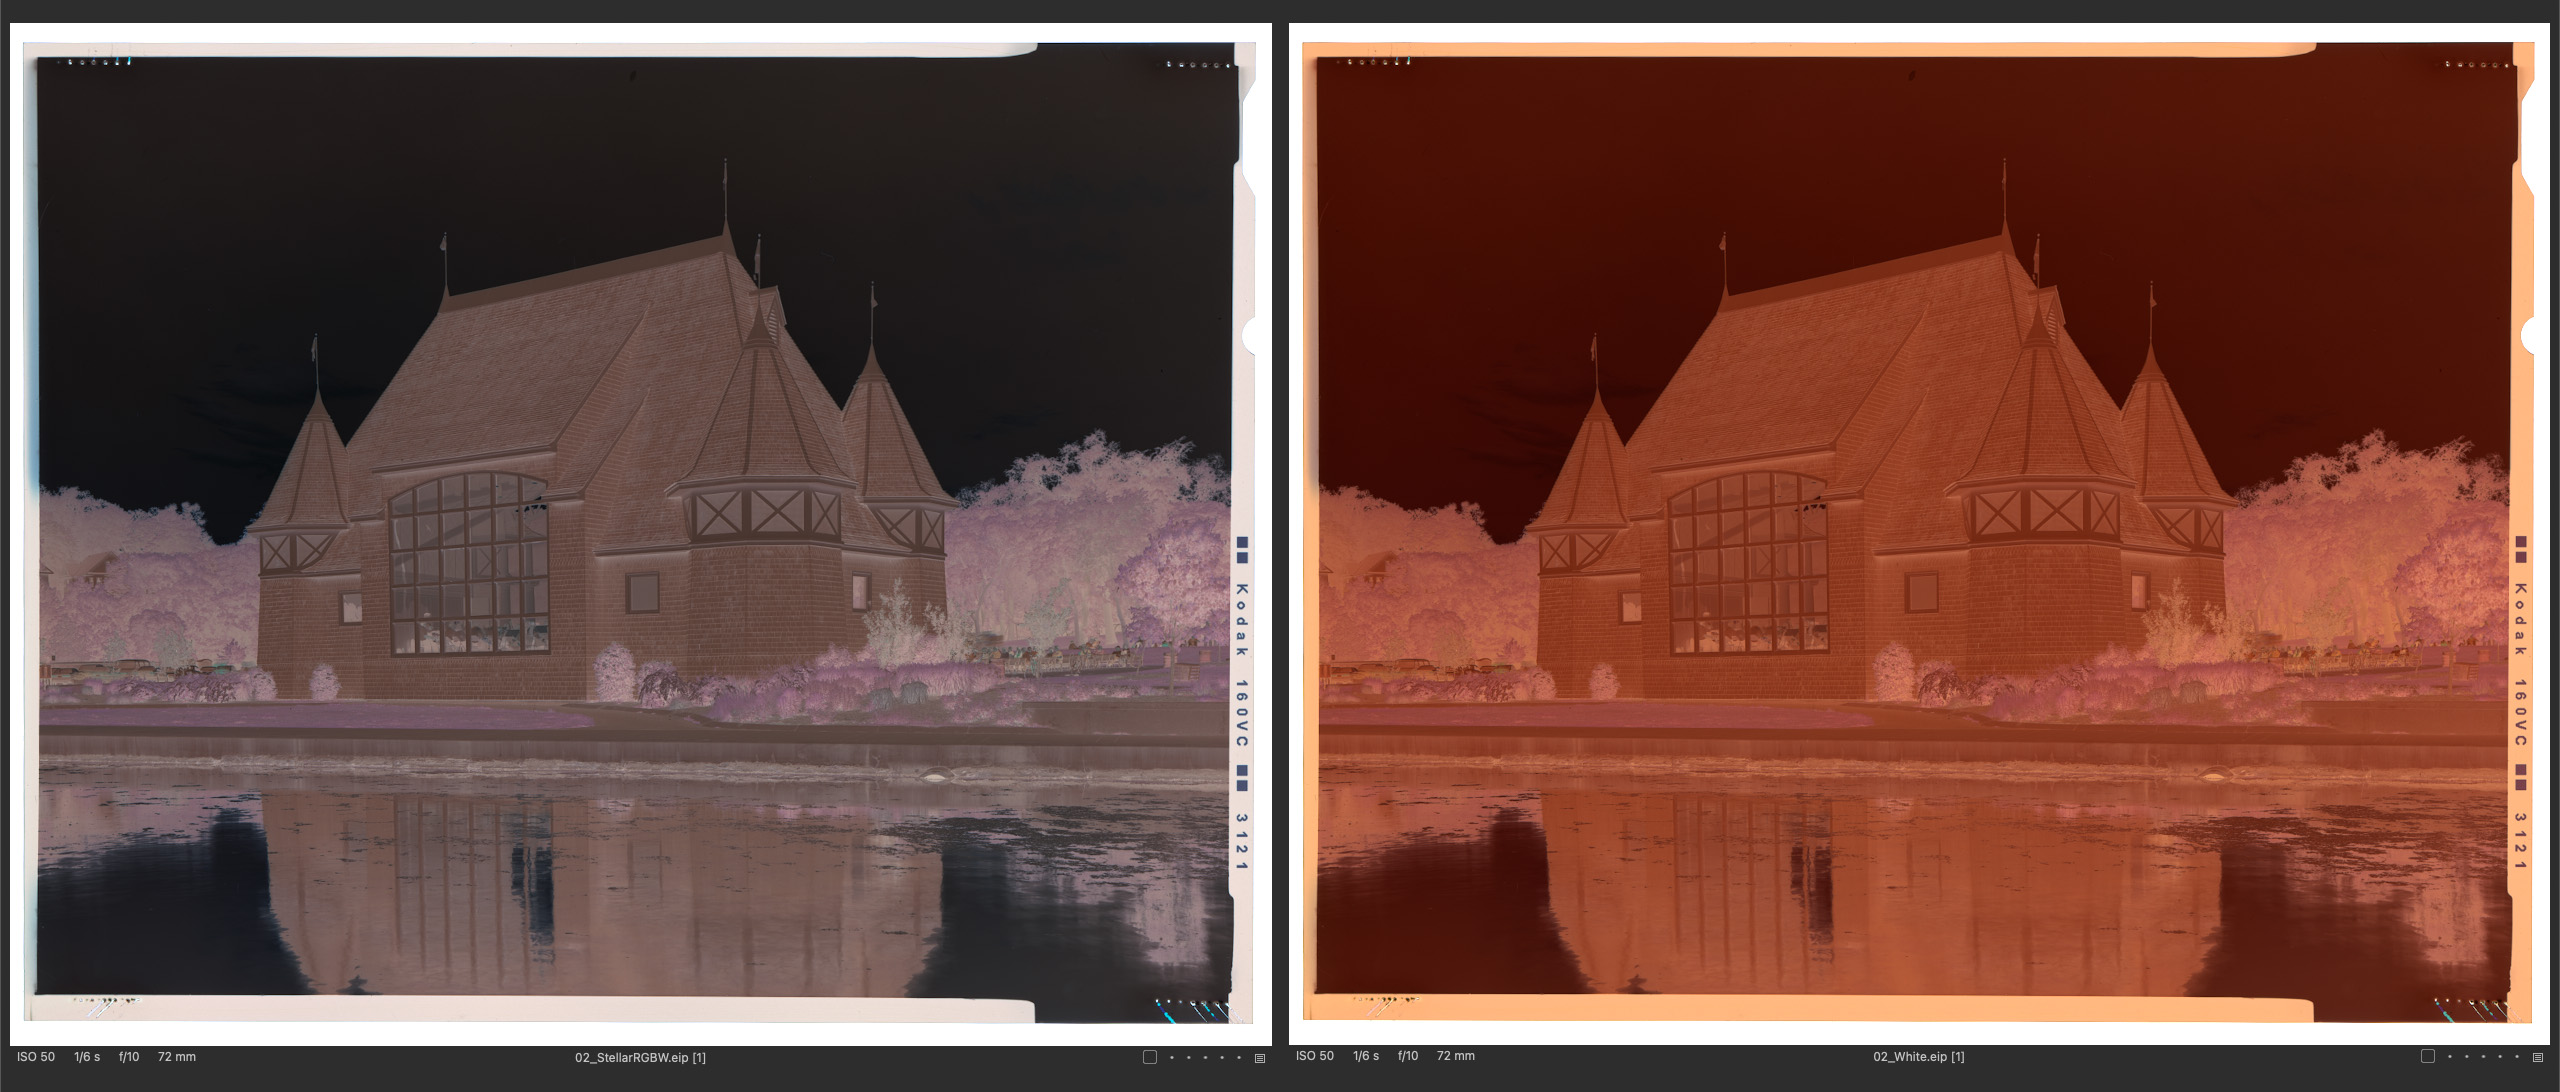
DT Nexus can calibrate the DT Stellar RGBW to any modern or historic color negative emulsion in around 30 seconds, and save that calibration as a preset for future use with that same emulsion. Calibration fundamentally shifts the spectral output of the light based on a real-time analysis of the film, so color is recorded the way the emulsion was designed to be captured in the first place. Once calibrated — or once a saved preset is selected — you can capture frames of that emulsion in a fraction of a second.
Raw Files That Handle Normally
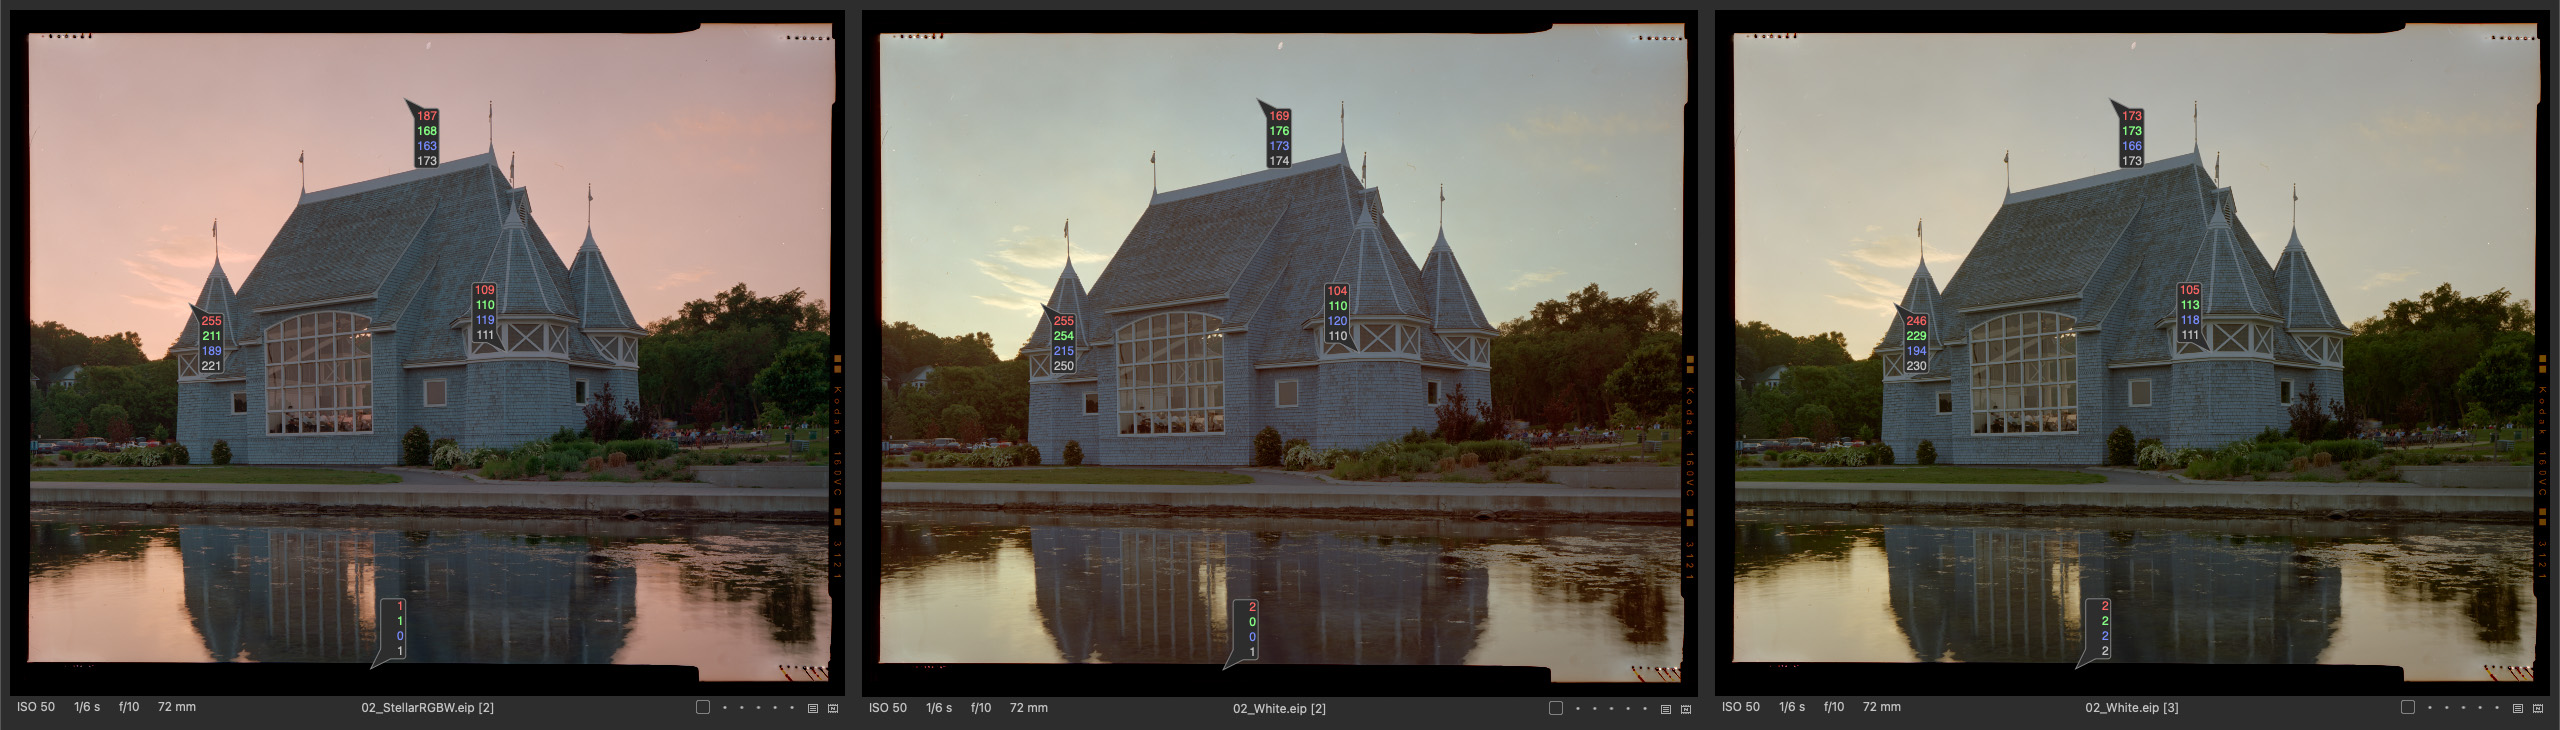
Post-processing is still a subjective process — you may want to add or remove contrast, warm or cool an image, or otherwise make it your own. But spectrally calibrated color negative scans from the DT Stellar RGBW behave just like normal images under those adjustments. That’s a stark contrast to handling raw files captured under standard white light in general-purpose photo software, where white balancing to a darker tone can throw highlights into strange hues, or adjusting exposure can lead to hard clipping on levels that were only pushed that far to try to fix the underlying color in the first place.
Typically, tweaking color negative scans is a slow and arduous process. Capture One’s “Convert Negative,” for example, requires you to first crop to the image area, which then means uncropping afterward if you want to include the film rebate or edges. With the DT Stellar RGBW, scans behave normally under adjustment and don’t require you to crop and uncrop along the way. Because the color is formed correctly at capture, adjustments are also far more universal — they can be copied and pasted across images shot at different exposures without introducing weird cross-over color casts (you may still want to use the exposure slider separately to compensate for exposure itself).
Capture One’s “Convert Negative” and software like Negative Lab Pro also struggle with atypical images. These tools use the content of the scene itself to correct color, which works reasonably well for neutral lighting with subject matter that contains neutral darks and neutral whites. But that approach performs poorly on images with colorful highlights — like the twilight image above, with its pink sky white point and blue-green black point — as well as on images where one primary color dominates the scene, and on low-key or high-key images generally. When you accurately capture the film in the first place, a simple inversion is all that’s needed — no auto-levels, auto-channel-balance, or other automatic correction that would otherwise rob an atypical image of its true color.
No Noise Amplification
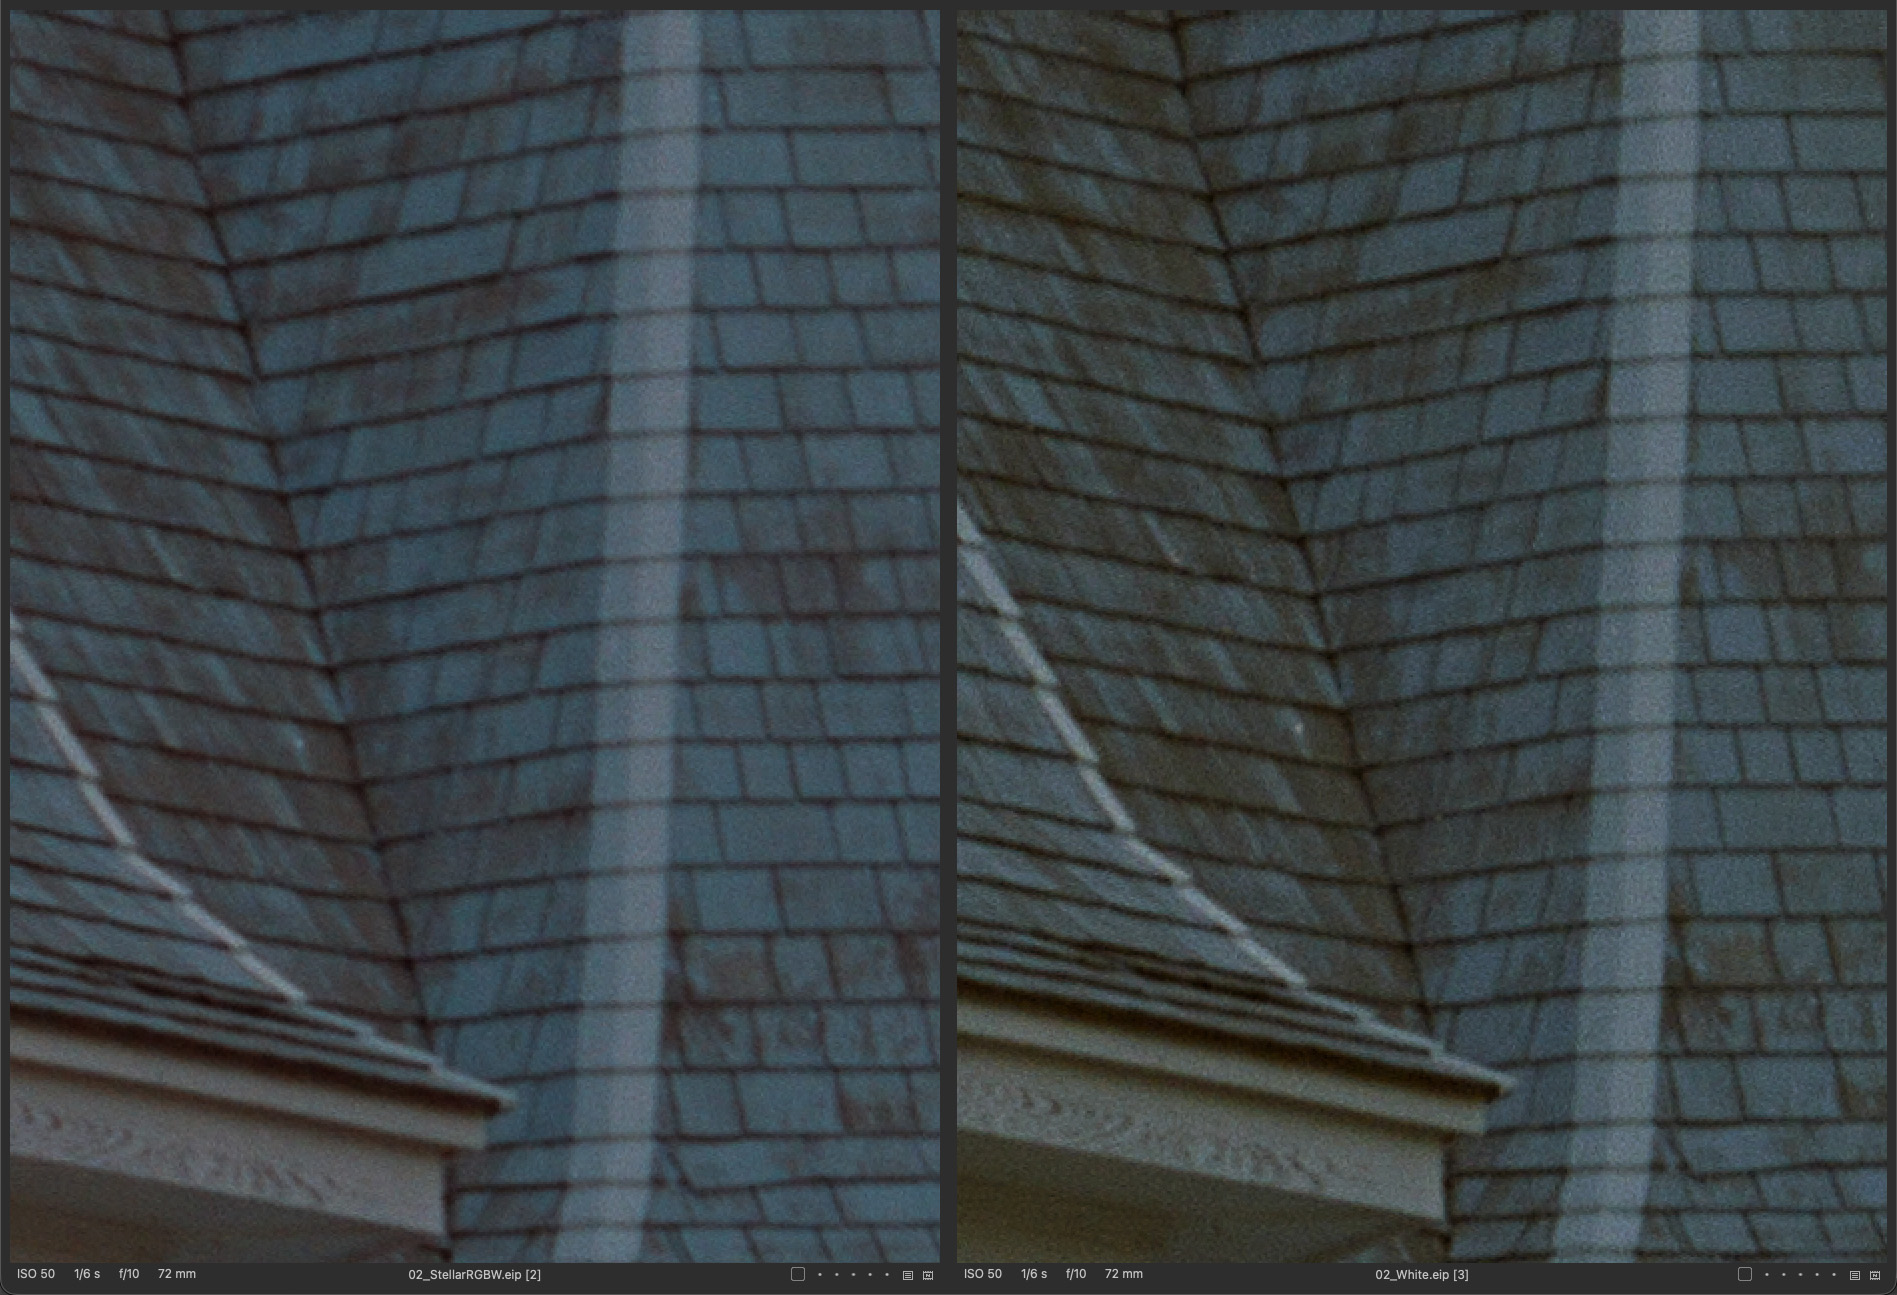
When you capture a color negative under standard white light, the red channel of the orange-brown film base dominates the histogram. The blue and green channels — which together make up 75% of the pixels on a Bayer sensor, since there are twice as many green photosites as red or blue — get pushed to the far left of the histogram, exactly where capture noise lives. Every pixel ends up some shade of orange-brown and has to be aggressively stretched apart into something resembling normal color. Stretching data that far inevitably makes it noisy, so it’s no surprise that even modern color negative film — film that produces fine grain and smooth tones on an RA-4 print — ends up looking like a noisy mess once scanned this way.
With the DT Stellar RGBW, spectral calibration ensures all three channels carry equal weight and land on the right side of the histogram from the start. The result is that you see what’s actually on the film: some emulsions render smoother, others grittier, but always without added digital noise on top. The impact varies by emulsion and by the tone and color of the subject; the comparison above sits toward the higher end of the difference you’ll typically see.
Leveraging Resolution for Workflow Speed
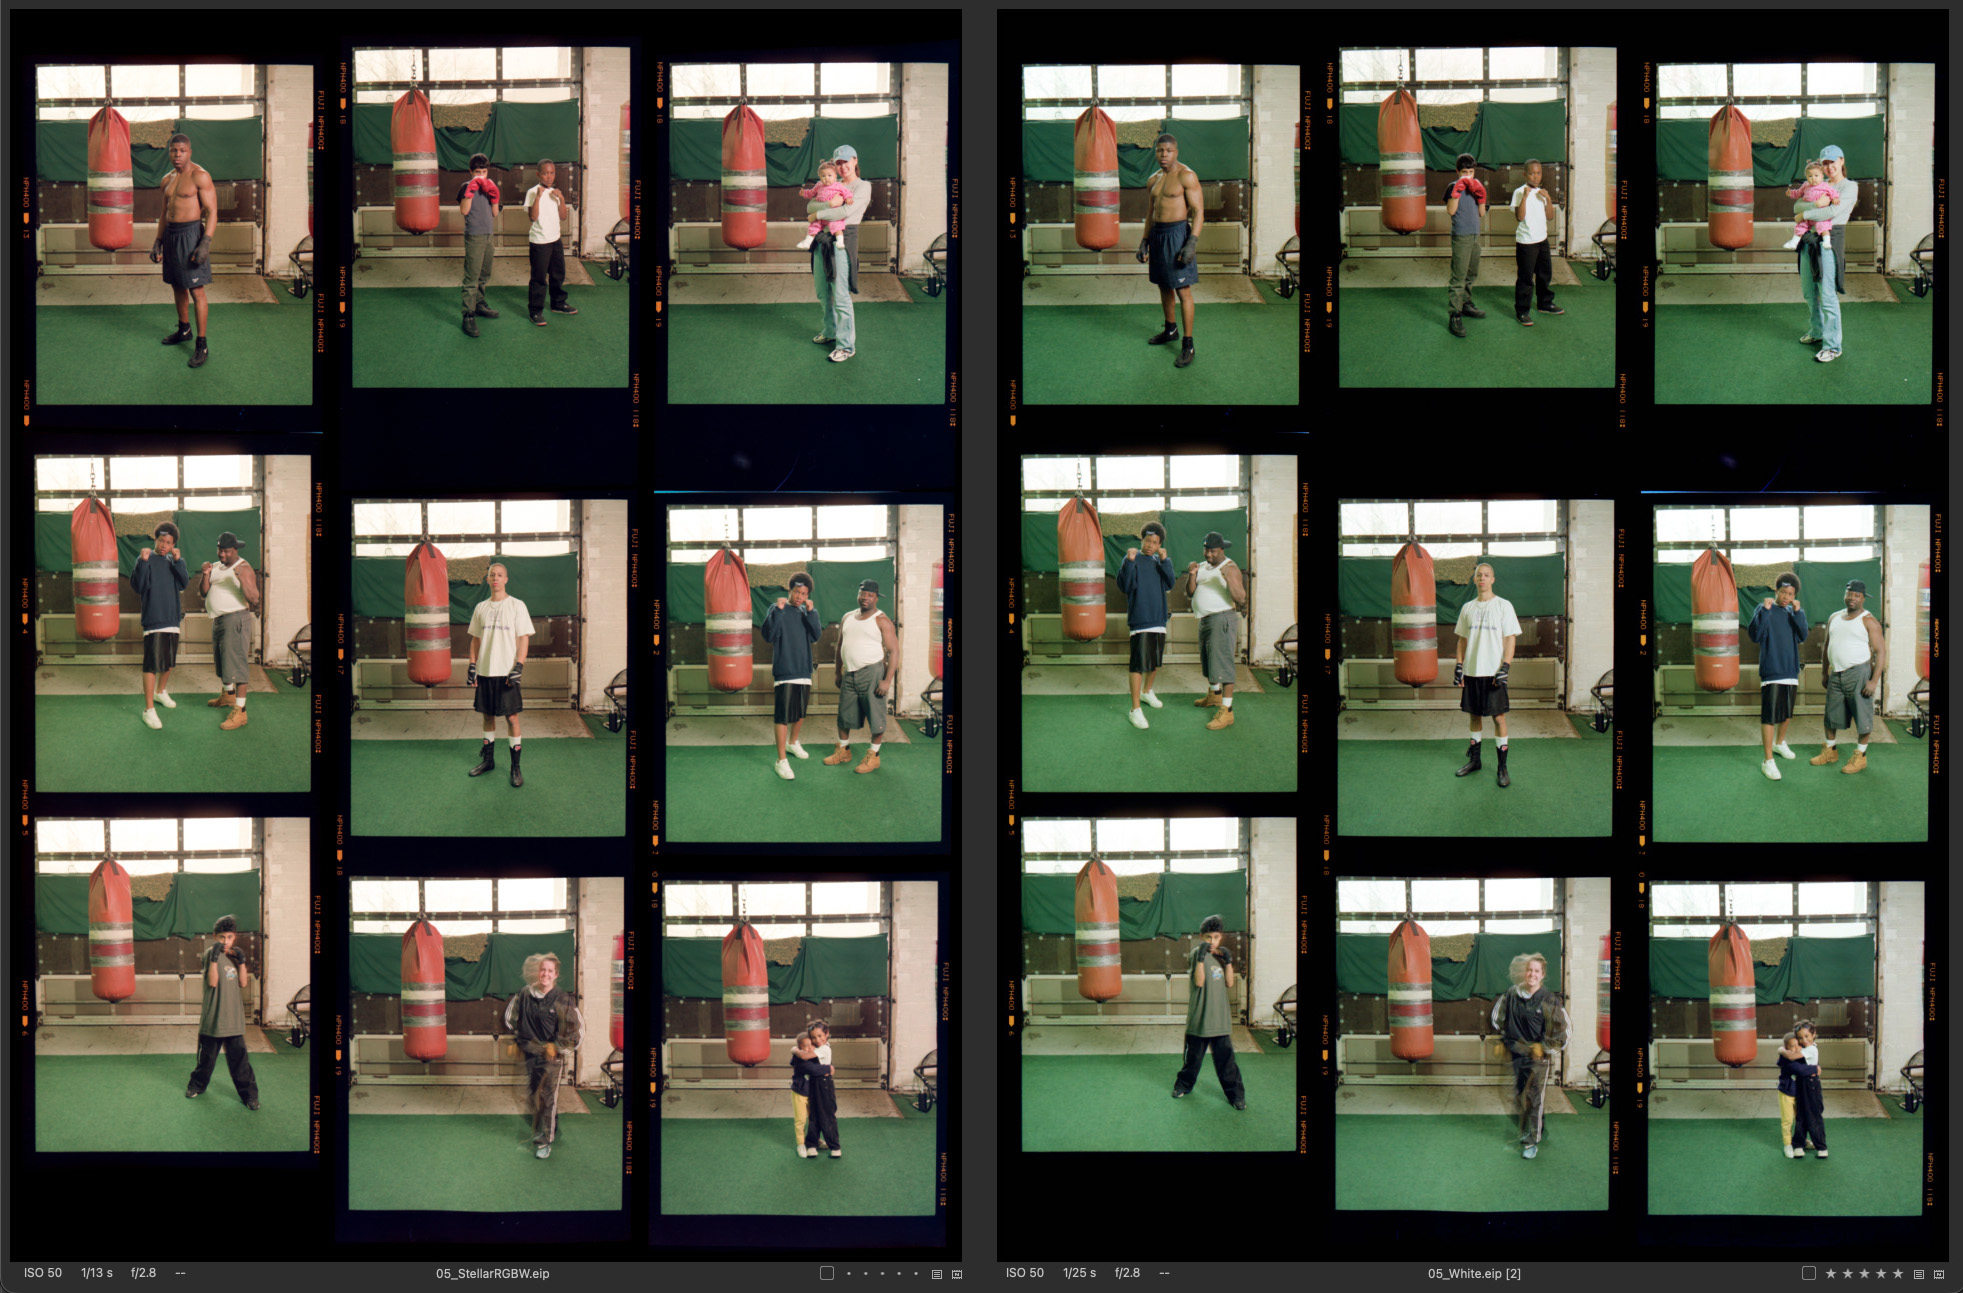
At IS&T we also had the new DT / Phase One iXH 250MP on hand, which delivers 19,200 pixels on the long edge. That resolution allows entire film sheets to be scanned in a single click while still holding decent detail on each individual frame. The sheet pictured above holds nine frames from a Fuji 670, and the iXH 250MP captures all nine at once, with roughly 24 megapixels of detail per frame, in a single click.
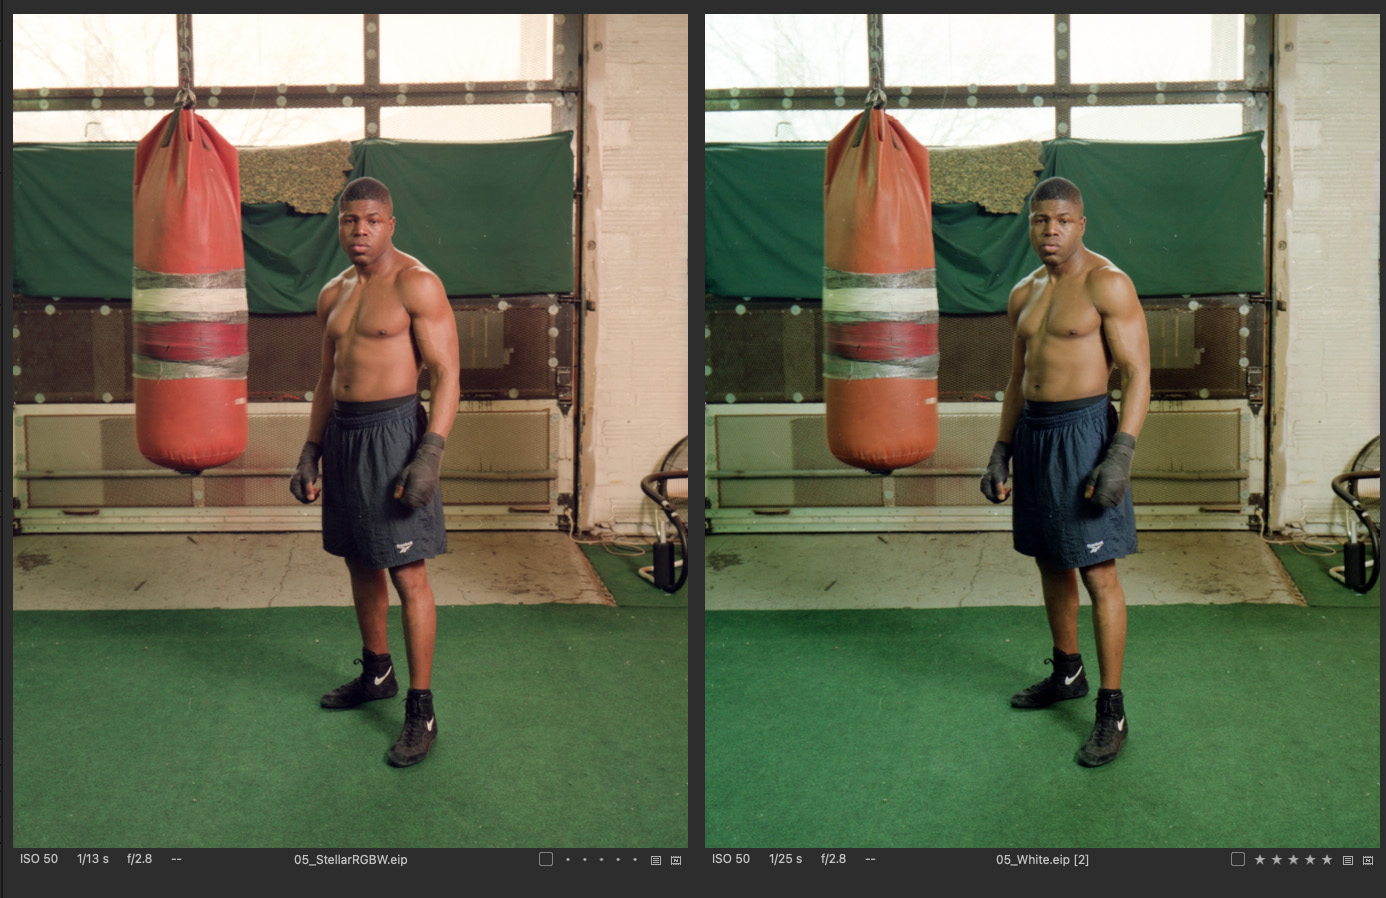
Of course, individual frames can also — and typically do — get captured on their own at 250 megapixels per frame (5,400 ppi), or at even higher resolution using tiled capture and stitching. But for some institutions and collections, the ability to capture an entire sleeve of film without removing individual frames is a welcome gain in throughput.
Years in the Making
It has taken our R&D team six years to bring authentic color back to film negative scanning. Better yet, we’ve built it in a way that integrates natively into a digitization program that also captures slides, black-and-white negatives, lantern slides, glass plates, and other transmissive materials. Explore more with DT Nexus and a free 90-day trial.
Want to learn more about the DT Stellar RGBW or DT Nexus? Email us at info@digitaltransitions.com.